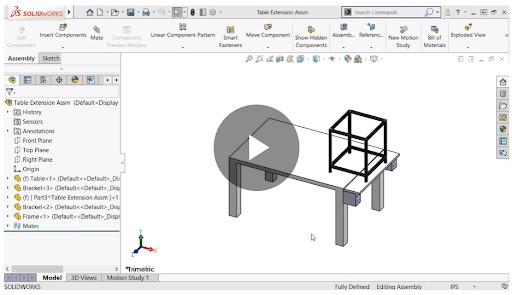
This SOLIDWORKS training article on how to use a topology study for generative design is by SolidProfessor.
The unique qualities of generative design
3D printing is rapidly becoming a viable form of manufacturing thanks to improvements in materials, software, and 3D printing processes. 3D printers are also becoming much more accessible for personal use, with many people creating and printing their own 3D designs at home.
With traditional machines and manufacturing processes such as CNC milling, it’s very difficult, and sometimes impossible, to produce complex geometry. But 3D printers give engineers and manufacturers the ability to create parts with unconventional and complex shapes. As a result, generative design is becoming a more popular process among design engineers and manufacturers.
Generative design is an iterative design process in which a software program edits a part’s geometry until it meets necessary requirements. However, the designer can enter specific constraints the software program must adhere to. Parts that have fluid, organic surfaces or webbed lattice structures are often created with generative design programs and designed for 3D printing.
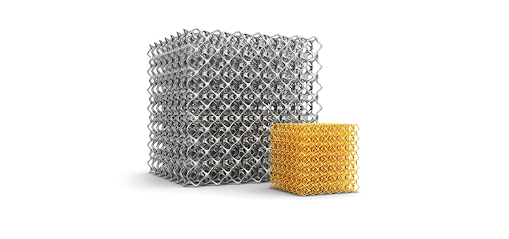
Some 3D printers, such as fused deposition modeling (FDM) 3D printers, build parts layer-by-layer with support structures. This allows you to print overhangs and makes it possible to print more unique generative designs. Powder bed fusion printers, such as selective laser sintering (SLS) and multi-jet fusion (MJF), are even better — the geometry possibilities are virtually unlimited. This is because no support material is required for these types of 3D printers because the powder is already self-supporting.
Using a topology study to get started with generative design
A simple and fun way to get started with generative design is by using a Topology Study in SOLIDWORKS Simulation. A topology study “performs nonparametric topology optimization of parts. Starting with a maximum design space and considering all applied loads, fixtures, and manufacturing constraints, the topology optimization seeks a new material layout, within the boundaries of the maximum allowed geometry, by redistributing the material. The optimized component satisfies all the required mechanical and manufacturing requirements.”
Improve your skills in SOLIDWORKS Simulation with these online video tutorials! >>
Example Project: Building Brackets for a Table Extension Using Generative Design
Let’s take a look at an example project that shows how this works.
In this project, our objective is to build brackets for a table extension. The table extension will add a little more surface area to free up some space, and help support our 3D printer.
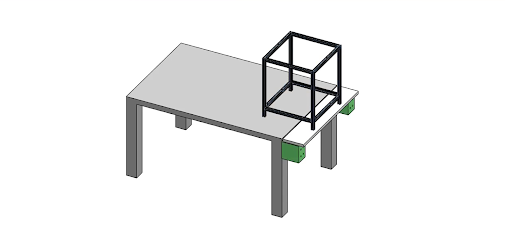
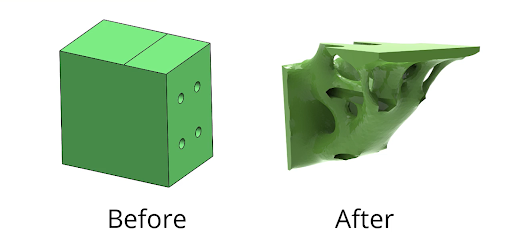
We’ll intentionally design the original bracket as a plain, rectangular block (see the green blocks in the image above).
Instead of spending the time to fully design a unique bracket shape and then testing its strength later, we can use SOLIDWORKS Simulation to perform a topology study. The topology study will automatically create a bracket that’s strong enough to support the weight requirements while using the least material possible.
The bracket blocks dimensions are five-by-five inch and three-by-five inch. These act as a set of size parameters for the generative design to create the parts’ geometry for us.
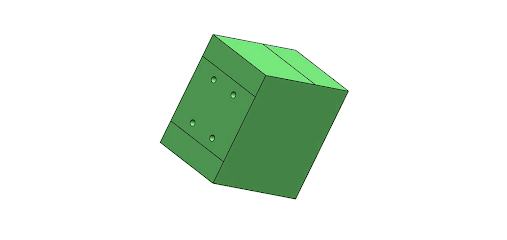
We only need the table extension to support about 10 pounds. But on the safe side, we’ll design the brackets to support 20 pounds each. We can use a topology study to test this. The study will create a generative design by removing all of the unnecessary bracket material within the given parameters. This will also ensure the part will be able to hold 20 pounds. The topology study will only leave the material that’s necessary to hold the required weight we specified in the parameters.
After you run the topology study, the end result has a very unique aesthetic when compared to the original design. On top of that, this method uses just a fraction of the plastic filament from the original design and has a significantly reduced print time. And of course, since we let SOLIDWORKS design the geometry for us, we save significant design and testing time, too.
In this study, we wanted to be sure to use the correct Fixtures and Manufacturing Controls. We also made sure to specify the plane of symmetry for the study, or else we’d end up with some strange results.
After the Topology Study is complete, we’ll export the generative design as an STL file for 3D printing.
If you want to learn how to set up this project step-by-step and create your own unique generative design, visit SolidProfessor’s online training platform to watch the full tutorial for free!
Free Video Tutorial: Using a Topology Study for Generative Design

Was a bit hesitant to try at first but CMS IntelliCAD turned out to be a good alternative for me. The free trial worked immediately, which was good to try it out before paying for it. All the features it offers are user-friendly and easy to work with, which was another win for me. Good job.