
Start a free membership and get SOLIDWORKS tutorials & online training today.
Although most of placing a weldment profile in the library was covered in an earlier post, I wanted to go through it on a separate post. There are a few key things to remember here.
1. Know where weldments are stored. If you’re like me you’ve had a few service packs and maybe even multiple versions of the software installed on your system. This can lead to having more than one folder that *should* contain weldments. If you’ve got a CAD manager who properly updates all template files that is great. If not no worries, just find out where those folders are and point SW to them. Under Tools>Option>File Locations select Weldment profile from drop down. Every external file reference can be found this way, including all Design Library folders, note that the design library folder is NOT necessarily the same as the weldment profile library. Usually these are stored on a global server, which helps eliminate reference problems on multi user systems, but if you are running a personal or home license you can slap a folder right on your desktop. 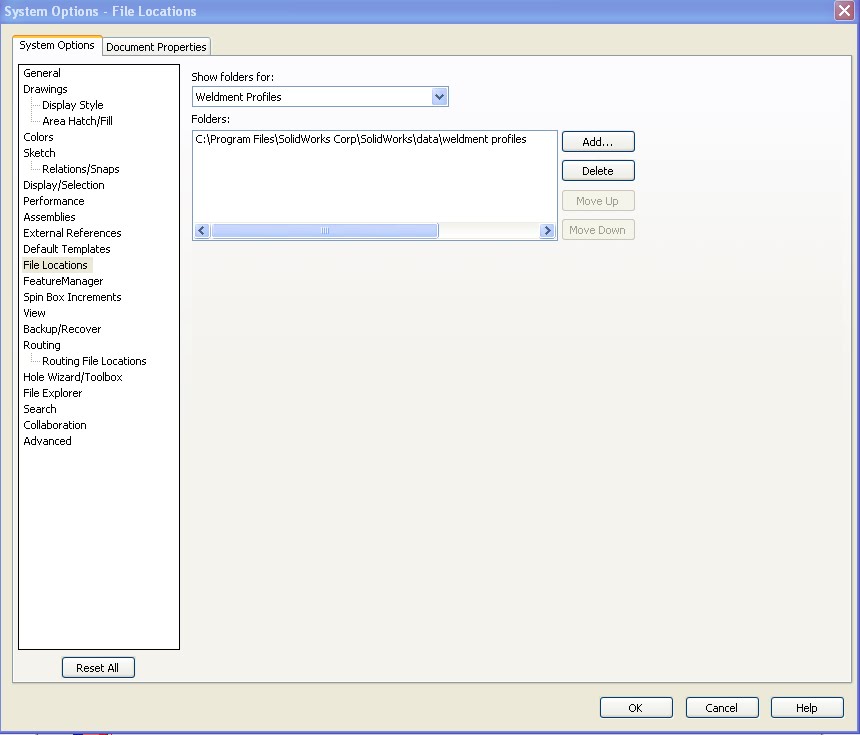
2. Saving to the Library. File>Save As will get you most of the way, then select the file type “Lib Feat Part (*.sldlfp). Once this file type is selected the browser window will automatically navigate to the design library folder. Again this is the DESIGN LIBRARY FOLDER noted in step one which is NOT necessarily the weldment profile library. If they are not one and the same, navigate over to the weldment profile library manually.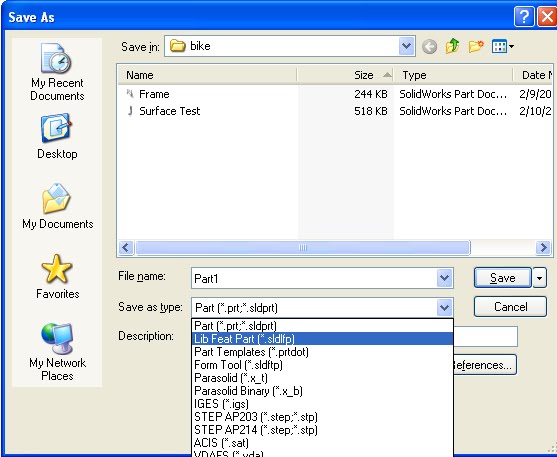
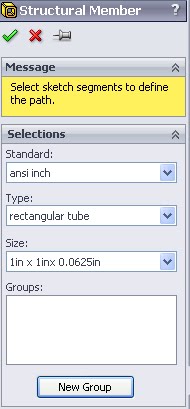
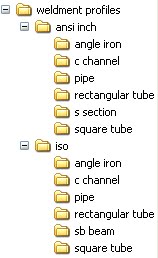
3. You’re STILL not there. The main folder denoted in step one doesn’t even contain the actual profiles. Instead in contains more folders. To figure out how these are organized I need to try adding a weldment. I created a new part file with a single line and tried adding a structural member. That brought up the property manager below on the left. Below right is the file structure of my weldment profile folder. It is easy with this view to see how the folder names relate. The top level is the Standard. Type is a subfolder inside of the Standard folder, and the Size is the actual file name inside the Type folder.
 As with all library features the actual feature needs to be added. So open up the profile file and take a look at the feature tree. Right click the feature that contains the profile.
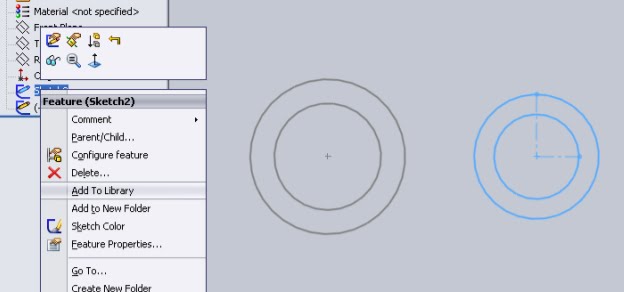
Select “Add to Library”, as seen above, I am only selecting ONE of my two sketches here. A small green arrow will now be added to the feature that looks like this ![]()
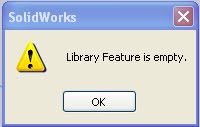
![]() . This will only add the feature selected and for weldments ONLY one should be added. For other design library items more than one feature from a part can be used. However if you try to create more than one profile in a single weldment file this error will pop up when adding it to a part.
. This will only add the feature selected and for weldments ONLY one should be added. For other design library items more than one feature from a part can be used. However if you try to create more than one profile in a single weldment file this error will pop up when adding it to a part.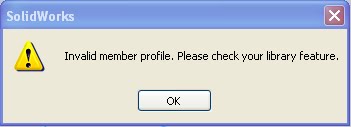 That’s all of it. Now check out the rest of the weldment reviews.
The condensed version.
1. Select the weldment profile folder.
2. Save a profile to the proper folder
3. Right click the one (and hopefully only) sketch in the file and select “Add to Library”
Get new tutorials & online training now to become a Certified SOLIDWORKS professional.
Very useful article. Thanks!