Get 30+ expert tips, tricks and practices to up your SOLIDWORKS large assembly performance. Download Your Quick Fix Guide to Managing Large Assemblies in SOLIDWORKS for free .
In this tutorial, we’ll take a look at creating a drawing with an exploded view to illustrate the assembly structure of a simple sheet metal enclosure. The drawing will illustrate the relative location of the parts in the assembly and a bill of materials to identify each component. You can use the concepts covered in this tutorial for more complex assemblies with larger bills of materials. Let’s get started!
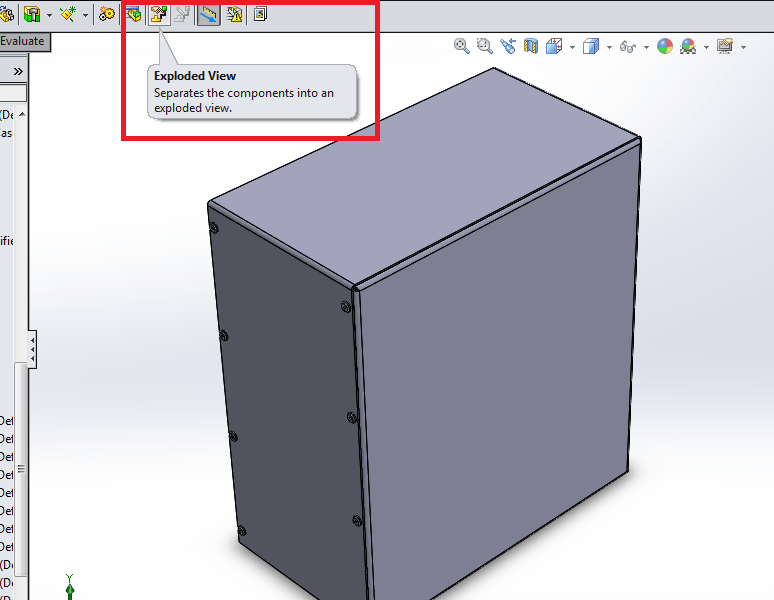
Creating the Exploded View
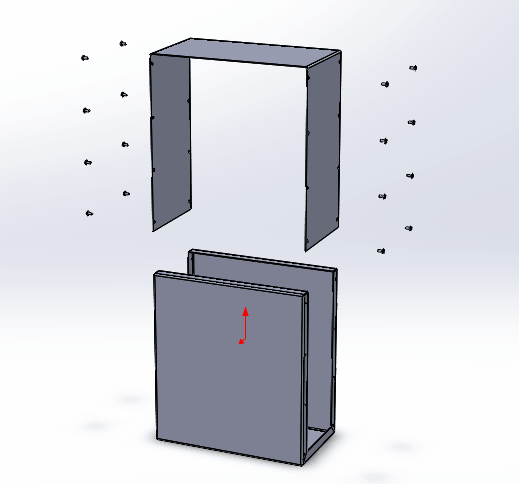
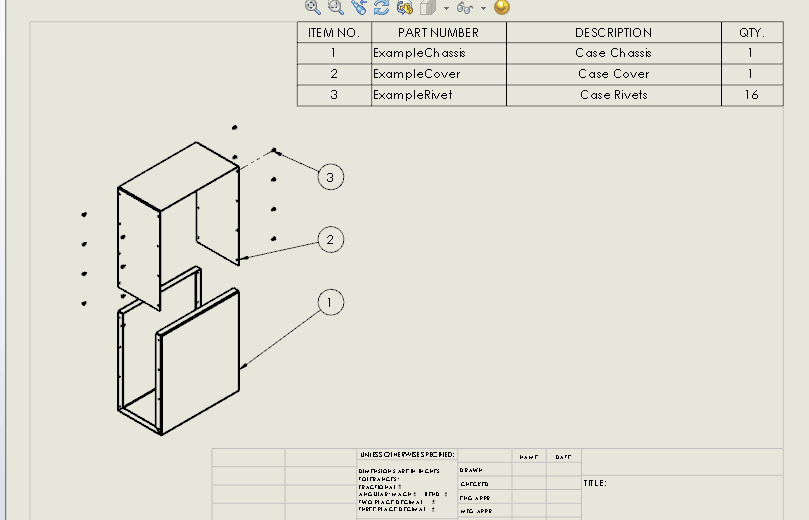
First, we’ll open up an assembly containing a combination of three parts – a single sheet metal chassis, a single cover, and 16 rivets.
Next, we’ll create the Exploded View for this assembly. Select the Exploded View feature in the Assembly toolbar.
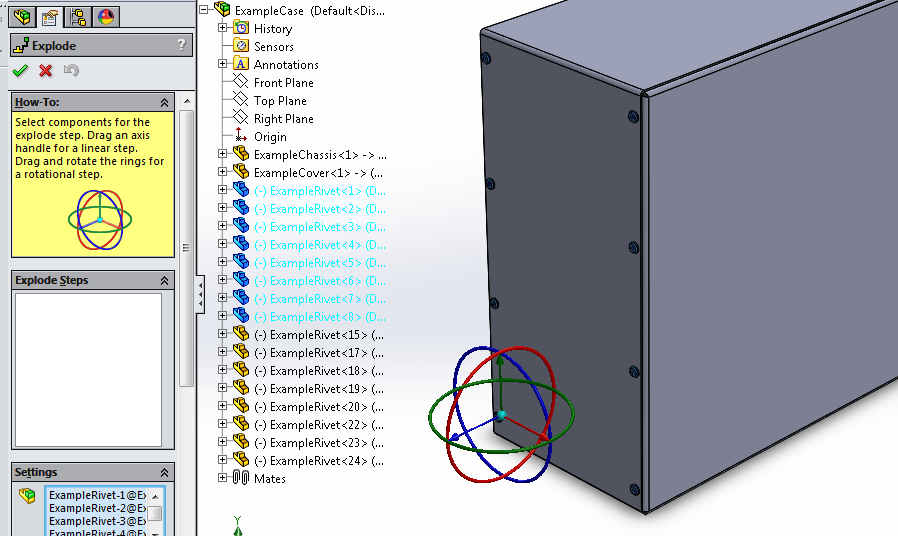
Select the first eight rivets in the component tree to the left of the screen.
A three-axis control icon should appear in the assembly area. Select and drag the blue arrow on the control icon (Z-Axis) out some distance to move the rivets away from the sheet metal cover. Click away in the empty space of the assembly window to apply “Explode Step1.”
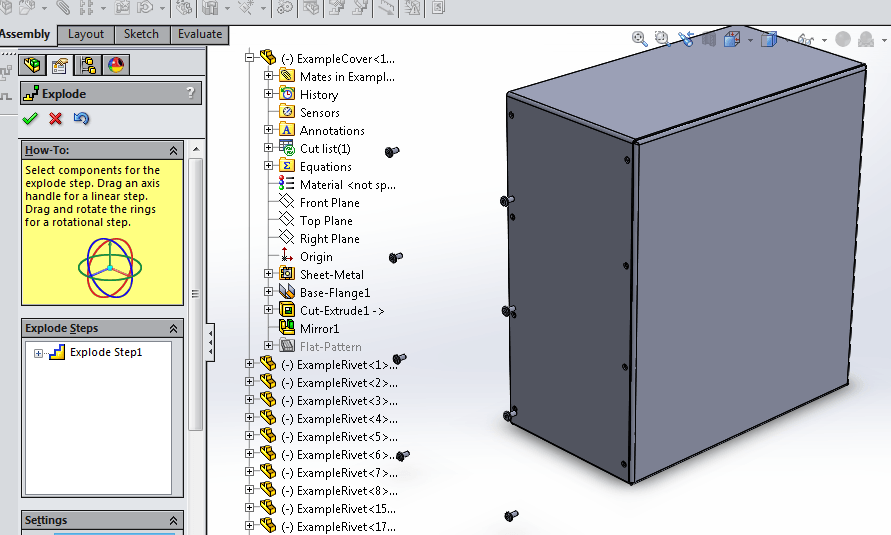
Repeat this process for the second set of eight rivets on the opposite side of the assembly.
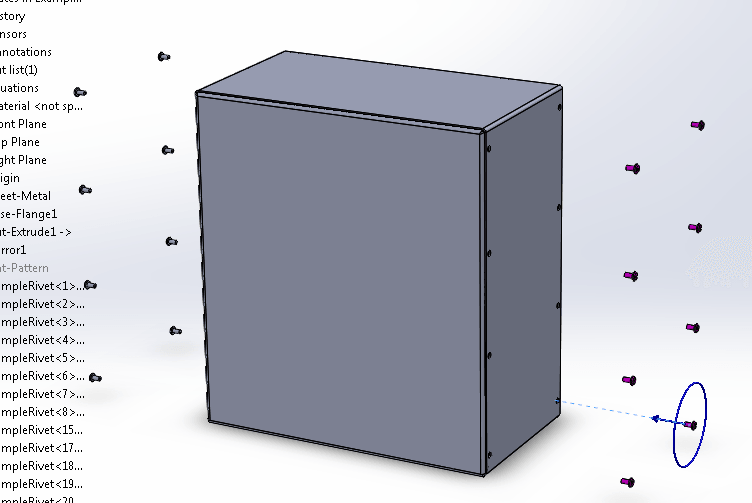
Again, click in an empty area of the assembly to complete the second explode step. Finally, select all 16 rivets and the cover component and using the same process, move all of the selected components along the Y-Axis, so that they are floating above the chassis component. See the image below.
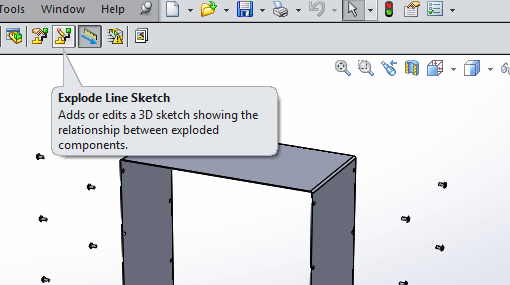
Finally, let’s add a single Exploded Line Sketch to illustrate the way the fastener fastens these two parts.
Click the Exploded Line Sketch Tool.
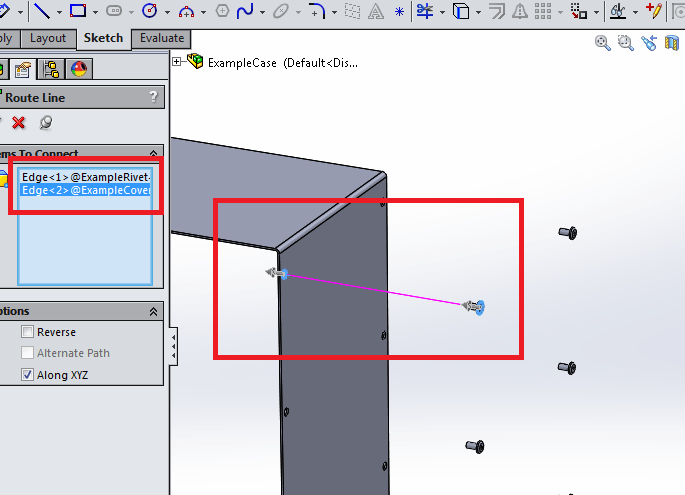
Select the outside edge of one of the rivet heads, and then select the edge of the corresponding fastening hole. (Hint: If the line which is created appears to point in the wrong direction, select the “Reverse” option when creating the line.) This type of sketch can be useful when your exploded sketch has many small parts or fastening locations for assembly are unclear. Select OK to close the Route Line prompt. Then, select the large green check in the upper right hand corner to exit the Exploded Line sketch.
Bring the Assembly into a New Drawing
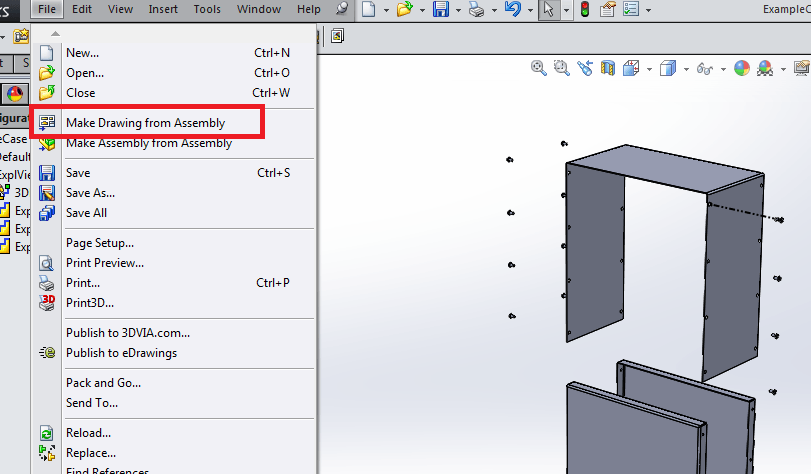
Now select File > Make Drawing from Assembly.
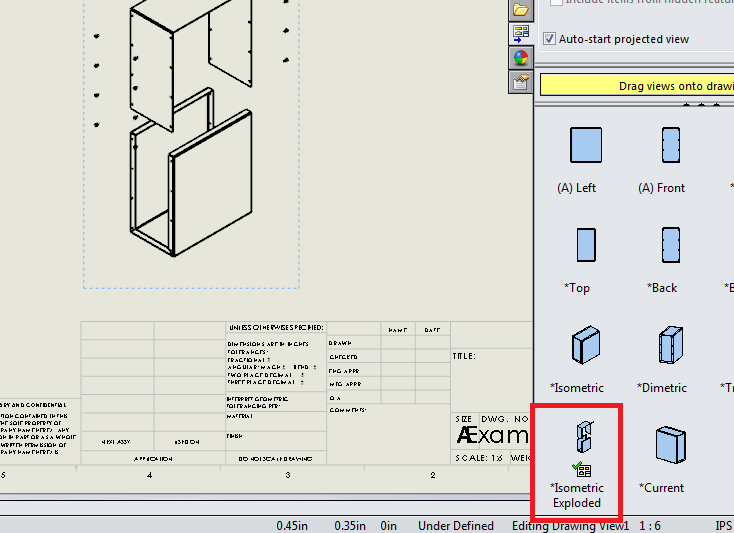
Select your chosen drawing format from the list. This will open up a new drawing. To the right side of the screen, you will see the assembly for which you are creating the assembly drawing. Click and drag the Exploded Isometric View and place the view in the drawing space.
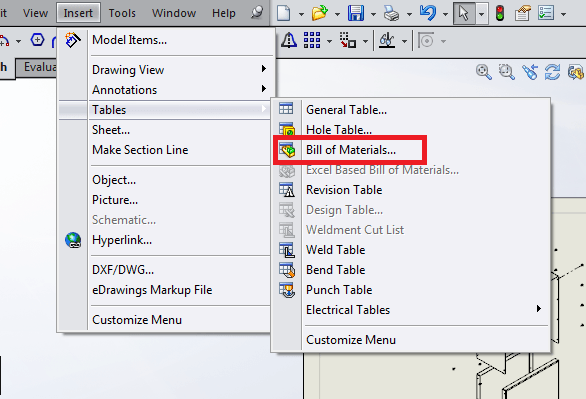
Creating the Bill of Materials
Now, we’ll select Insert > Tables > Bill of Materials, as shown below.
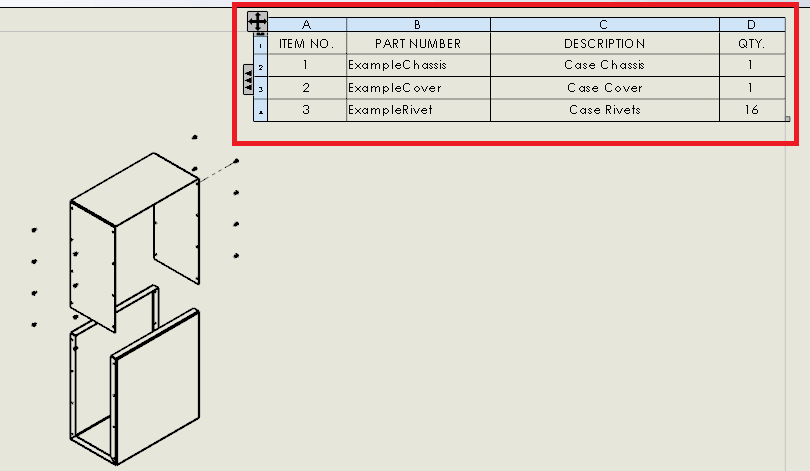
Select the exploded drawing view that you dragged onto the sheet, and select OK. Place the table in the upper right hand corner of the drawing as shown. This shows a bill of materials for the assembly.
Final Steps
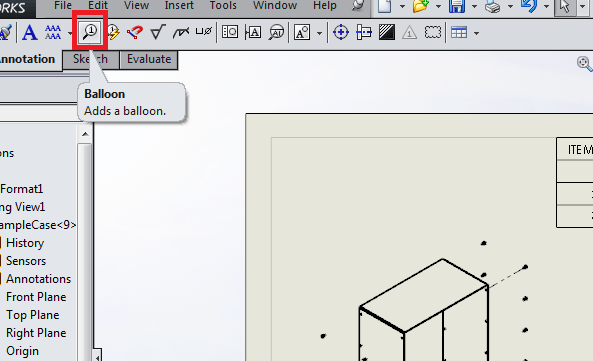
Finally, select the Balloon option in the Annotation tab.
Select each of the three types of parts in the assembly to attach a numbered balloon to the assembly.
This completes your basic exploded view for this assembly! By completing this tutorial, you learned how to create an exploded assembly view along with a bill of materials in SolidWorks. Good job!
There are loads of other resources available, books, videos, blogs. Focusing on one portion at a time and developing a learning plan makes things much easier. For more advanced users, or those looking to brush up skills without a certification, check out some of these tutorials and training courses.
Feel free to add any advice/tips/thoughts in the comments.
Get SOLIDWORKS video tutorials, sample exams, exercise files & online training now. Access more SOLIDWORKS tutorials and drawings with exploded view.