
Prepare for SOLIDWORKS certification with tutorials and sample exams.
This article is a guest post by Jim Lucas
FINALLY- The last 5 articles have just been an intro and prep for this material. Couple of notes: if you haven’t read those articles, please do. It is critical to have that foundation.
I found Mold Tools to be a simple exam- my career did start in the injection molding industry however, and I have been doing CAD for a while… so I’m use to the terminology in the industry and quirks in most CAD systems. Both of those skill sets together is somewhat uncommon. Nevertheless, from what I’ve read on other blogs, the consensus is that this is the easiest of all the advance CSWP exams. As you can see below- I nailed this one.
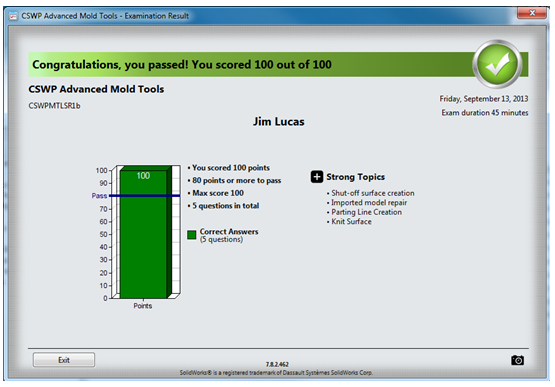 |
| Mold Test Results CSWP Solidworks |
If you are comfortable on the sample test, you should do fine. Here are a few pointers: Making molds is a systematic 7-step process:
- Open and check the part.
- Modify the part as necessary (for shrink and draft).
- Determine a parting line.
- Figure out the shut-offs.
- Create parting surfaces.
- Create transition surfaces.
- Create tooling (core, cavity & slides).
There are some additional steps to making tooling (adding runners, cooling lines, ejector pins, etc…), but we are focused more on passing the test than teaching tool design. That being said, no question covers the full process, but knowing the steps makes each question a matter of just following the process (or knowing when & how to shortcut the process).
First thing to do is add “Mold Tools” to your Command Manager tabs. Just right-click on any command manager tab and add “Mold Tools”. There isn’t any noticeable advancement from 2013 to 2014 in Mold Tools. There are some neat changes in the Plastics Premium module (including Mold layout), but nothing that can be used for an edge in the test.
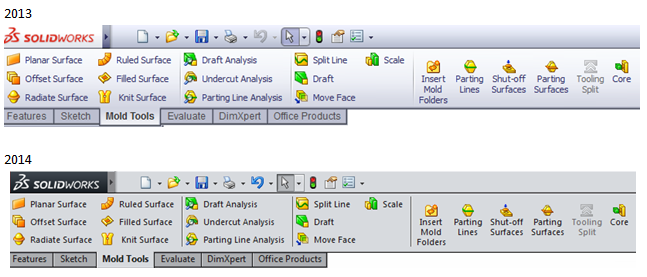 |
| Molding Toolbar in Solidworks |
Download the sample test file @ http://www.solidworks.com/sw/support/7322_ENU_HTML.htm .
Try to do the sample exam by yourself first. It should take less than 30 minutes. Here’s my solution set.
Sample Question 1 – CSWP Mold Tools
First thing is to open Bracket in SolidWorks. Make sure that your open settings allow “All Files” not just SolidWork files. (Hopefully you have a 2 monitor set-up, with the sample test file on your smaller monitor, and SolidWorks on your larger monitor).
SolidWorks will want to run “Import Diagnostics” and “Feature Recognition”. For test taking purposes: “Yes” to Import Diagnostics, “No” to Feature Recognition. Here’s why: Import Diagnostics does not take much time and will probably fix any gaps. Feature Recognition takes a good amount of time, sometimes alters geometry & does not offer any benefit in a testing situation (no geometry changes will be required).
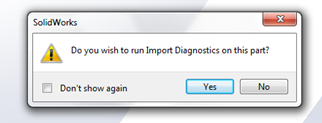 |
| Mold Tools Import Diagnostics |
Next- press the Parting Line icon under the Mold Tools tab:
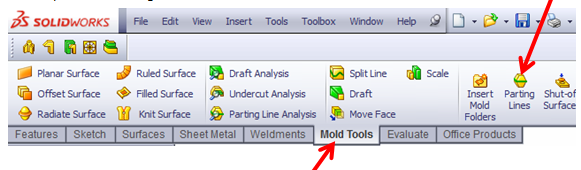 |
| Parting Line Creation |
I like to choose the “Top Plane” for the parting surface (even though you could choose the horizontal flats on the piece). Make sure to check “Use for Core/Cavity Split” and “Split Faces”. Select a segment of the parting line, and then the continuation button. Then hit the green check mark.
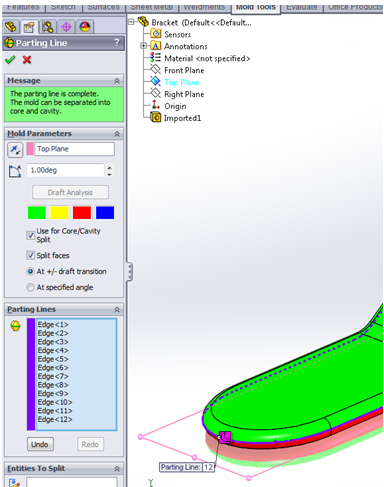 |
| Split Cavity and Core in Solidworks Mold Tools |
There are no shut-offs, so we can skip step 4 and go to step 5.
Then choose Parting Surfaces:
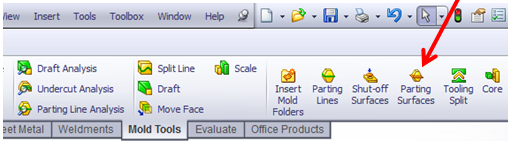 |
| Create Parting Surface |
When in this tool, I just made the length of my parting surface 6” (in each direction) to cover the 10×10” mold base dimensions. It doesn’t matter if you have smoothing on or not.
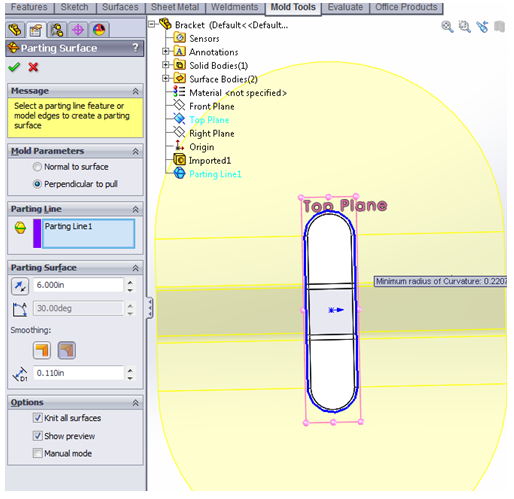 |
| Parting Surface Creation |
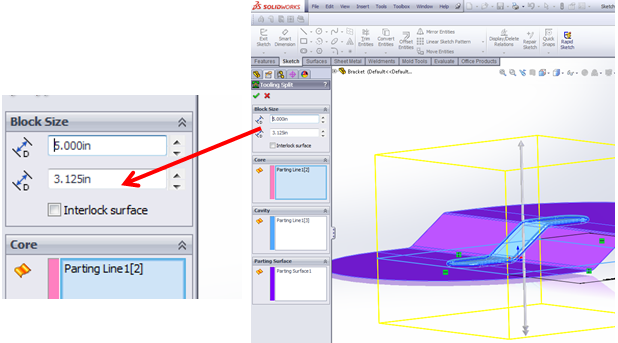
Lastly we build the tool (no need to mess with transition surfaces). You start by making the base. I read ahead and did not see a need to store the dimensions as Equations. Also, this sketch is made on the “flat” section of the parting surface (doesn’t matter which one since both distances to the mold bottom are provided).
 |
| More on core creation – Define the size |
Depending on whether you picked the “high” parting surface or the “low” parting surface, decide how far you want to extrude the block.
 |
| Mold Insert Creation |
Hide what you don’t use (part and one half of the mold). Spend a minute checking to be sure your dimensions match the exam (using the measure tool).
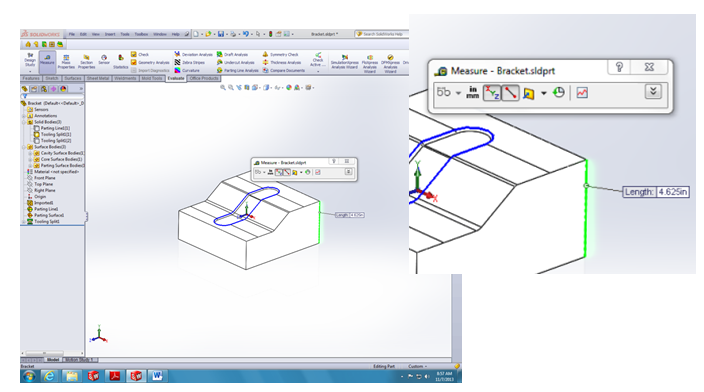 |
| Bracket Measure for CSWP Mold Tools |
Next: add a material by right clicking on “Material” in the Feature Manager.
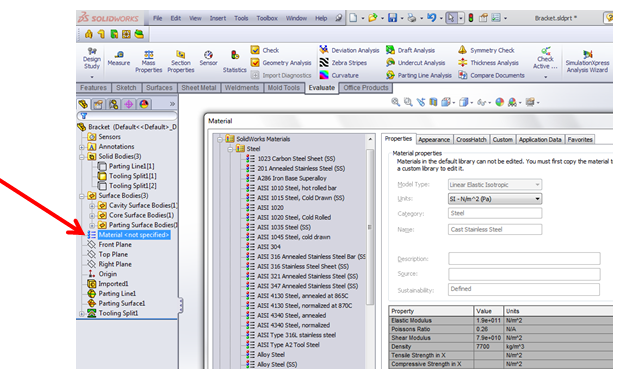 |
| Material Selection for Molds and More |
Lastly- get the weight. Make SURE that the “Include hidden bodies/components” is NOT checked.
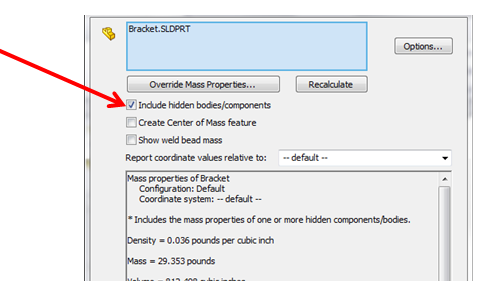
Quick note: If you get an answer that does not match, figure out what you did wrong. In a test, there is a variety of multiple choice and fill-in questions. The multiple choice questions allow you to know whether you are doing things correctly or not (if everything matches, you’re good).
Question 2- CSWP Mold Tools Sample
This one is pretty simple- Hit “Draft Analysis”
 |
| Draft Analysis |
The trick is to go into “Face Classification”. You may want to spend some time understanding the different options that come up when you check “Face Classifications” and “Find Steep Faces”.

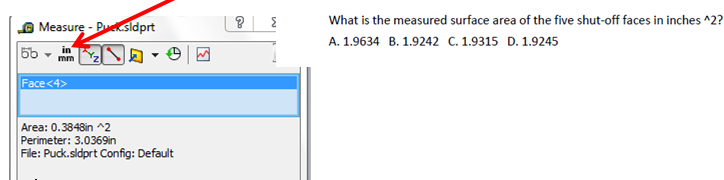
Question 3- CSWP Mold Tools Sample Test
Just get the surface area of the shut-offs. You can do this using the “Shut-off Surfaces” tool or by just making flat planar surfaces.
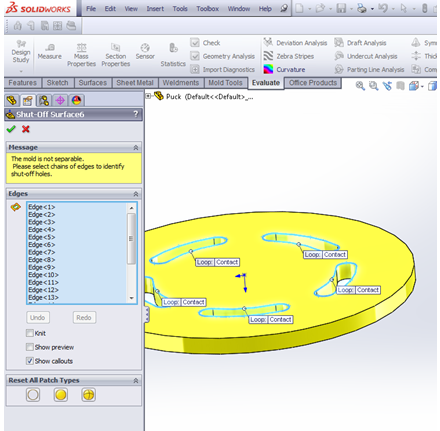 |
| Shutoff Surfaces |
When you measure the surface area, the Solidworks calculated surface area may not have 4 decimal places after it. Just press on the Units/Precision to adjust.
 |
| Answer Percision |
OTHER GOOD TIPS: Learn some surfacing. It is always helpful for Mold Design, and critical for Import Repair.
OTHER GOOD MOLD & TOOLING LINKS:
http://grabcad.com/questions/tutorial-solidworks-mold-toolshttp://learnsolidworks.com/solidworks_features/how-to-draw-a-coke-bottle-mold-in-solidworks
http://player.vimeo.com/video/51241776
http://www.3dengr.com/cswp-mold-tools.html
Tutorials- MOLD TOOLS There you are… have at it & let me know how you did. Feel free to shoot me an email if you have any questions. Thanks!

Jim is a CSWP and on the road to getting his CSWE. He works for HawkRidge Systems, an authorized reseller of SolidWorks. Jim also runs i-elf, a product development consulting company. He can be reached at Jim.Lucas@i-elf.com.