
Learn SOLIDWORKS at your own pace with more tutorials & online training free membership.
When making a drawing in SolidWorks, you can make entities called “Blocks,” which may be comprised of any single sketch entity or combination of sketch entities. Relations can then be made between these Blocks in a similar fashion to the way sketch entities in a part are related, or parts are mated. In this article, we’ll be creating a set of different blocks and then relating them to each other on a new drawing. Let’s take a look!
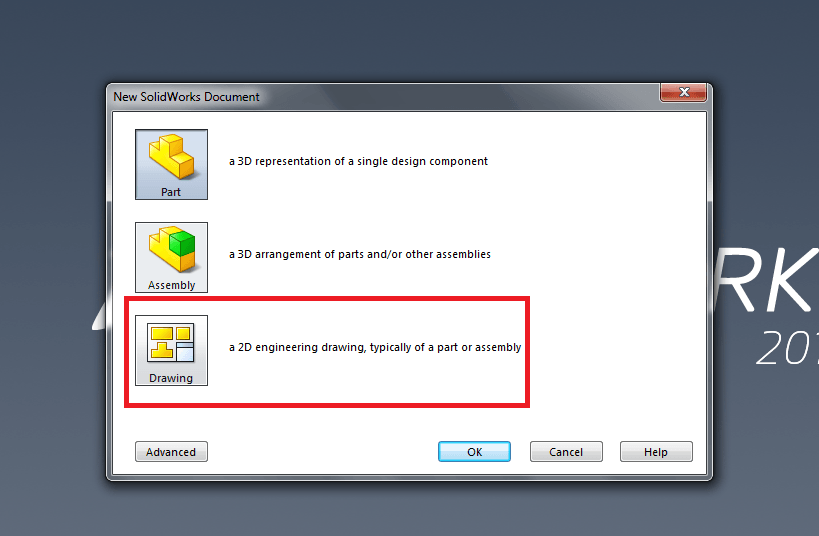
First, create a new drawing in SolidWorks. Use the default template, or another template of your choice; it won’t matter for the purposes of this tutorial.
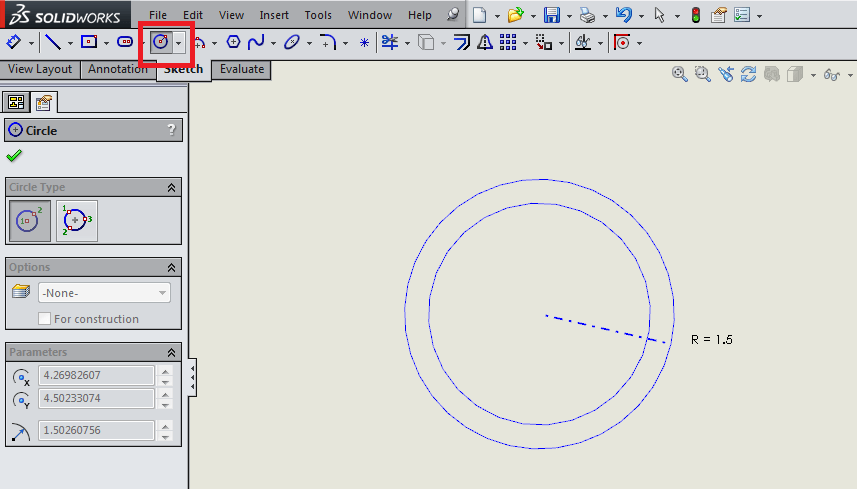
Start by creating two concentric circles on your drawing using the circle sketch tool, as shown below.
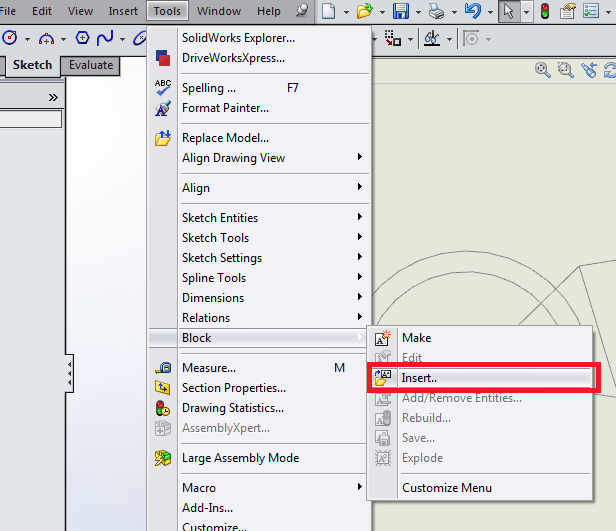
Now, select Tools > Block > Make.
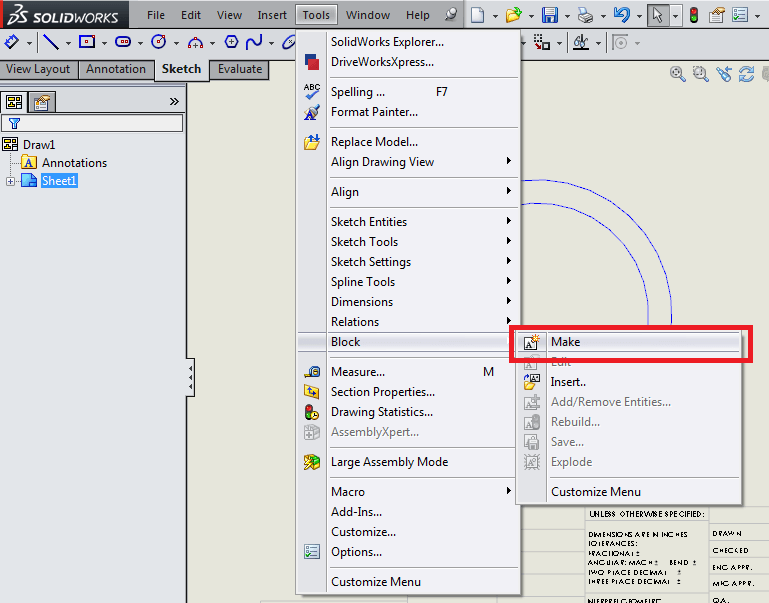
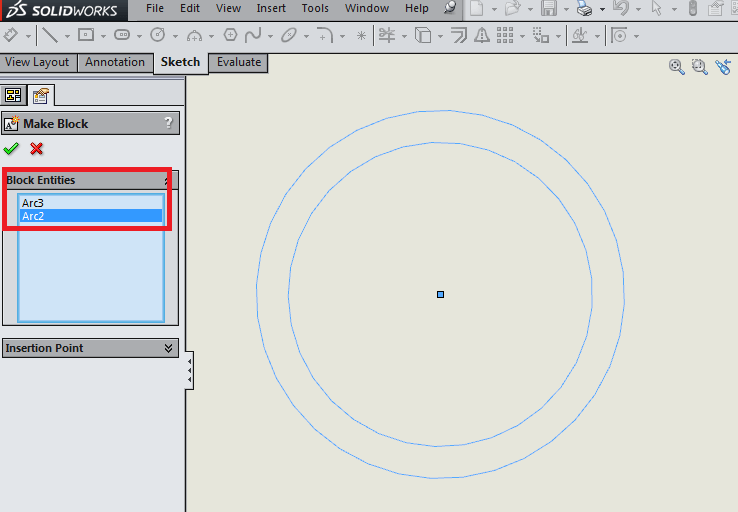
A Make Block property manager should popup on the left side of the screen. Now, take the following steps: • Select both circle entities you sketched. These entities will appear in the blue box;
- Click the double arrow for the Insertion Point specification;
- Drag the black arrow that appears to the center point of the concentric circles.
- Drag the blue orthogonal arrows to the center point of the concentric circles.
- Click OK.

Now, you’ve created your first block!
Notice that you can move it around the drawing as a single entity. You’ll see how the insertion point is used a little bit later on in this article. Next, we’ll create another block. Sketch a shape using six lines as shown in the image below. The exact dimensions aren’t important for the purposes of this tutorial. You’ll be able to modify them later if you’d like.

Take the same steps listed above in the concentric circle example to make a block using these six lines. Choose lower leftmost point as the Insertion Point.
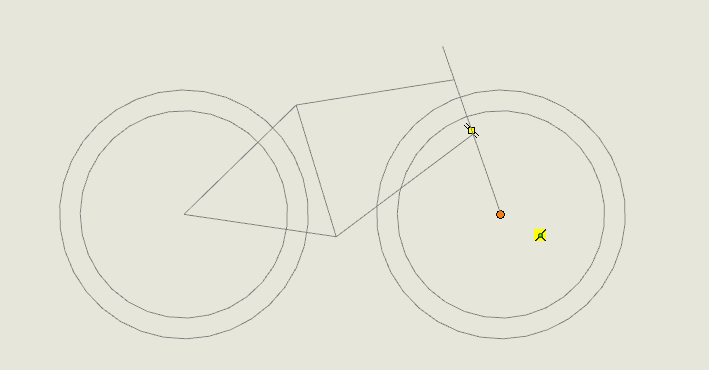
Now, you’ve created a second block. Drag the first block and make the center point of the block coincident with the lower left corner of the triangle in the second block you created, as shown in the picture.

Select Tools > Block > Insert, and select the first block you created from the list (the concentric circles). Your concentric circles will appear, and you will be controlling the block with your mouse at the Insertion Point. This was the function of creating the insertion point at the center of these circles when you created the first block.
Move the block to the end of the lower rightmost line in the second block, as shown below. As you can see, we’ve created a basic outline for a bicycle.
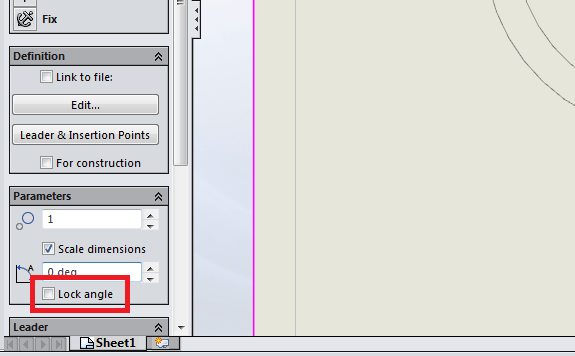
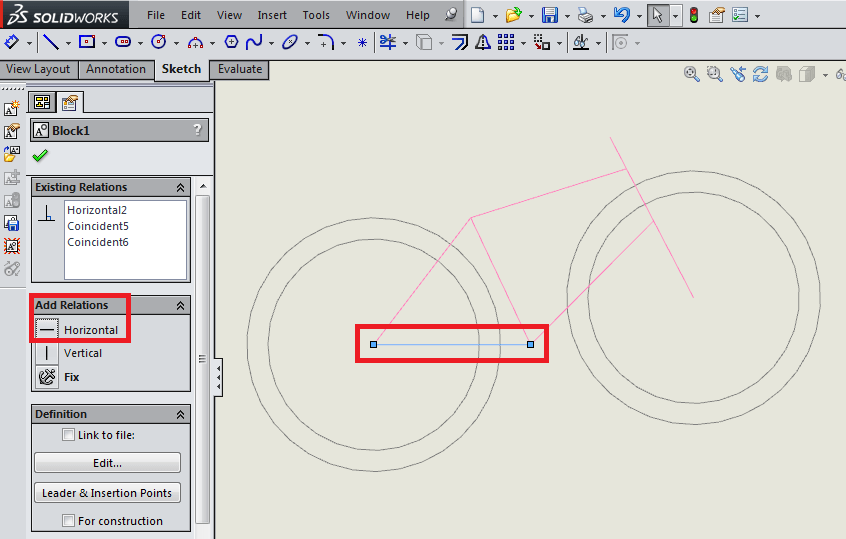
Select the second block, representing the frame. Scroll down to the Parameters box on the left side of the screen and uncheck the Lock Angle option.
Then, select the line representing the lower back frame member of the bicycle, and select Horizontal.
Now you can see how easy it is to work with blocks in SolidWorks. Notice that the blocks themselves can be moved as single entities, and constrained with other blocks using different sketch relations. You can even use the Explode Blocks command to dissolve blocks you’ve already made for editing independently.
There are many uses for Blocks in SolidWorks, whether it’s for diagrams, simple sketches for ideas, or checking the basic geometry of a system. I hope this article gives you some ideas of how to use them! Good luck!
Check out more Solidworks Tutorials.
 |
| Solidworks 2010-2015 Training |
Get Certified in Solidworks or for more advanced users, or those looking to brush up skills without a certification, check out some of these tutorials and training courses.
Feel free to add any advice/tips/thoughts in the comments.
Get SOLIDWORKS tutorials and learn at your own pace with a free online training membership.
Thanks for the tutorial! This seems like a great program for sketching out things for 3d printing.