
The top switch slider is broken, it feels like it does not engage, to fix the thing the remote must be opened. The front of the remote says RC32, there are 6 screws that need to be removed to take it apart. Two screws are located in the battery compartment, they can be accessed by removing the slide-on battery cover piece. Additional screws are located behind the dark gray oval panel on the front of the remote.
 and go
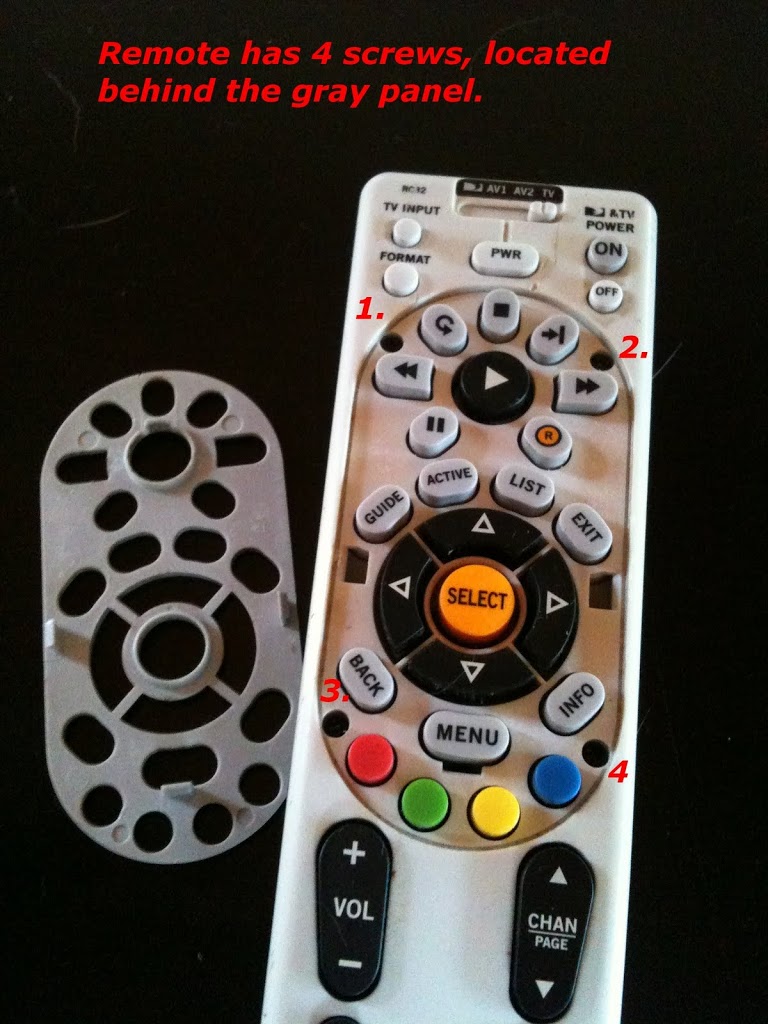
Front panel removal for the remote involves prying the gray insert out. Behind it are the 4 screws that need to be removed. The gray panel is held on by three molded snap latches. (Solvay has a nice .pdf regarding basic designs. More detailed information is found in textbooks, they’re boring but effective.) The size and shape of each snap fit can be altered to control how difficult removal will be. The three here require only a small amount of pressure (upward).

There are 3 snap latches on the RC32 , they can be pryed open using a small flat head screw driver. Insert it into the gap between the light gray oval piece and the whiteish front panel. Slowly run the flat edge around the oval lifting gently, each snap fit should disengage and the oval piece will rest higher in the recess. After releasing each snap fit turn the remote over and the oval piece should fall out. Once removed the 4 screws behind the panel can also be removed, a small phillips head screw driver will do the trick.
Once these 4 screws are removed (and the two in the battery compartment are removed) the remote is easily pulled apart, giving access to all the goods inside.
Thanks, just needed a quick clean for the play button, work like new!
Would not have ever figured out the screws under the grey oval!!! Thanks to whom ever is smarter than I
Thank you SO much! A gentle wipe to some sticky residue on the board & my fast fwd button works again 🙂
When reassembling be sure to get the positive battery contact of the circuit board into the “slot” of the black part of the housing…… It is easy to miss this.
Also be sure the sliding selector is properly engaged with the circuit board.